A few years ago, I embarked on a quest: to learn the ukulele on my own. I didn’t know anything about it back then. After a few years, however, I discovered some essential things that I wish I had known from the first day I started learning. This guide contains the practical advice I would give to any serious beginner.
1. Choosing a ukulele
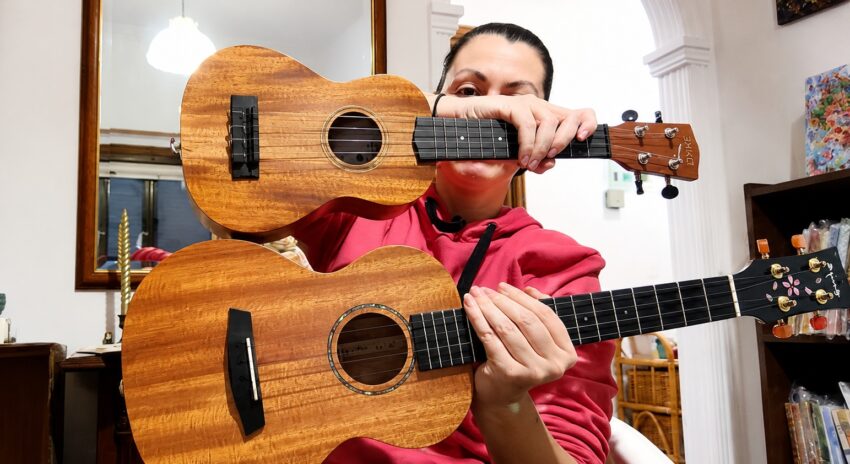
There are three popular sizes of ukulele. The soprano is the smallest one, at around 21 inches, and it is widely considered the most traditional ukulele. The concert is slightly bigger, at around 23 inches, and the tenor is bigger still, at around 26 inches.
They are all tuned in the same way, so if you learn to play one of these sizes, you can theoretically play the others as well. However, changing from a soprano to a tenor can feel quite different and may take some time to get used to.
Many beginners start with a soprano ukulele because it has the traditional feel, is small and is usually a little cheaper than the larger instruments.
It is also worth mentioning the baritone. This size is often chosen by more experienced players, including people who may already have guitar training, because it is tuned like the four highest strings of a guitar. Apart from these sizes, there are also sopranino and bass ukuleles.
When buying your first ukulele, do not buy a toy. Buy a proper instrument.
Even if you do not know whether you are going to play it for a long time, buy a decent instrument from a reputable company. If you later decide it is not for you, you can sell it or donate it to a music school or a child who wants to learn.
The reason I say this is that buying a poorly made instrument may be the reason you never touch a ukulele again.
Cheap instruments can have problems with their construction and setup. Small flaws in the distances between the different parts can make a huge difference. They may also come with poor-quality strings, and as a beginner, you may not know whether the strings or the instrument itself are causing the problem.
I almost gave up playing because my first ukulele was from a no-name brand and made my fingers hurt terribly. They hurt almost to the bone, and I could not understand why I was unable to play for longer periods.
When I decided to buy a proper ukulele, which cost around €110, the sound was a hundred times more magical. More importantly, I was finally able to play it without pain.
I believe the action on my first ukulele was too high. The action is the distance between the strings and the fretboard. If it is too high, you have to press much harder to produce a clear note. The strings may also have been of very poor quality.
If I had not bought that second ukulele, I probably would have stopped playing altogether.
I also want to clarify that the pain I felt from the cheap ukulele was unbearable. It was not simply the normal initial tenderness of the skin.
With my second ukulele, I was able to play for hours with only slight discomfort in the skin of my fingertips at first. After a few weeks, my fingertips became more accustomed to playing and the discomfort disappeared.
It was similar to the way ballerinas develop calluses on their toes and gradually become more comfortable in pointe shoes. But that first ukulele was something really bad!
A little fingertip tenderness can be normal when you begin, but severe pain in the fingers, joints or bones is not something you should simply push through. It may indicate a problem with your technique or with the setup of the instrument.
Whatever you do, avoid buying a toy-grade ukulele. As a rough guideline, I would aim for an instrument costing around €60 or more, although price alone does not guarantee quality. Check the brand, reviews and, if possible, whether the instrument has been properly set up.
Most musicians, even amateurs and beginners, have some idea of the kind of music they like to listen to and play. They may also have artists they admire for their skill and artistic interpretation of music.
If you already know what kind of music you want to make and which artist you want to emulate, it would be ideal to choose an instrument that fits those parameters.
For example, I love the sound and artistic presence of Taimane Gardner, but it took me a while to discover that she plays a tenor ukulele rather than a soprano. On top of that, she uses a doubled low-G string.
That is why I was unable to emulate her sound, and I would never have been able to without understanding these details.
To be honest, I will probably never be able to emulate her sound because she is a virtuoso and I am just an amateur. But at least I can dream that, in fifty years, I might get there. LOL.
Because I know I am not a virtuoso, I did not rush out to buy the most expensive five-string ukulele. I did, however, buy a tenor with a low G to accompany my soprano.
There is also a video by another artist that inspired me greatly, and that artist is also using a tenor. That is why I slightly regret starting on a soprano. Here is the video of Wind of Change by Paweł Strejczek
However, I believe that the more skill you acquire, the easier it becomes to change between different sizes.
The last thing to consider regarding ukulele sizes is the size of your fingers.
I have very thin, long fingers and still feel slightly cramped on a soprano. If you have bigger fingers, a soprano may not be the most comfortable choice. However, I have also seen people with very large fingers play soprano ukuleles beautifully, so this is somewhat relative.
If you want to buy a particularly special ukulele, I recommend searching for it on YouTube. Many people make detailed ukulele reviews, allowing you to hear the sound before buying the instrument.
2. Choosing a tuning method
You can tune your ukulele using a mobile app when you first begin, and that will work perfectly well.
If you want a good tuner that clips onto the ukulele, I recommend the Snark Rechargeable Clip-On Tuner. That is the one I use.
There are also more expensive and precise tuners, but unless you are a professional musician, you probably will not notice much difference.
New strings often require frequent tuning during the first few days or weeks because they are still stretching. You may even need to tune the ukulele multiple times during a single practice session.
After a while, (for me it usually takes around 2 weeks) the strings will usually hold their tuning much more steadily. Even then, you should always check that your ukulele is in tune before you start playing. Also, if you are not going to be using your ukulele for a long while, either due to lack of time or because you are practicing on another instrument, you should store it with the strings slightly loosened, not tightly tuned.
3. Nails
If you play right-handed, the nails on your left hand should be short enough that they do not interfere with the strings when you press down with your fingertips.
For my right hand, I mainly use my thumb, index finger and middle finger, so I keep those nails longer and shape them in a specific way.
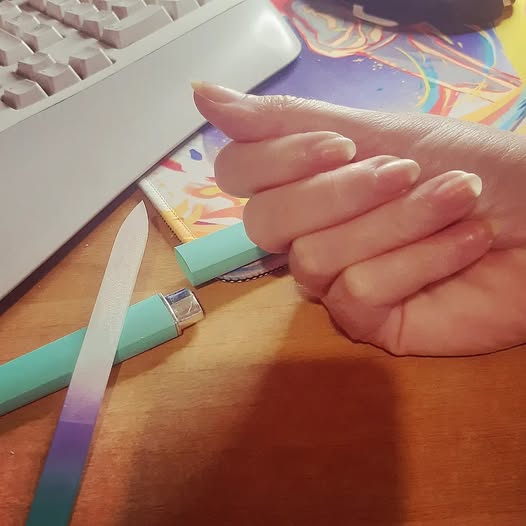
This video is the best one I have found about shaping nails for ukulele playing:
Fingernail Care for Ukulele – How to Trim, File, and Maintain Nails for Picking & Strumming
Trimming and shaping my nails in this way completely changed how I played. I recommend watching the video because, for me, it was a game changer.
Another thing that made an incredible difference was buying a high-quality glass nail file.
Affiliate disclosure: This article contains affiliate links. If you buy something through one of these links, I may earn a small commission at no additional cost to you. As an Amazon Associate I earn from qualifying purchases.
This is the nail file I use:
4. Strap
I have yet to discover how to hold a ukulele securely without a strap.
It is certainly easier when you are sitting down, but even then, I tend to strain my hands while trying to keep the instrument in place.
I delayed buying a strap because I was told that it was better to learn without one. Eventually, I bought one so that I could play while standing, and I never looked back.
Straps are amazing.
If your ukulele does not have a strap button, you can use this trick demonstrated by Bernadette:
3 DIY Ukulele Straps Under $5!!! (No drilling)
I successfully used the Command hook trick for many years.
This is the strap I use:
It is particularly helpful because it attaches near the end of the neck of the ukulele and provides a lot of stability. It also looks nice! I have two of these.
5. Actually playing 🙂
If you are learning on your own, begin by learning a few easy chords.
Choose a song that uses only two or three chords, such as C and A minor, or C and F.
Start with simple downward strums, like a bard playing in a medieval palace. Once you feel comfortable, gradually add more songs and introduce new chords.
Practise changing slowly between the chords. Try to use only as much pressure as you need to make the notes sound clear, rather than squeezing the neck of the ukulele.
You can then begin experimenting with different strumming patterns. Eventually, you can search for lessons on fingerpicking.
6. A note about the E chord
The E chord is notoriously difficult for beginners.
I found a way of playing it that involves bringing the thumb over the neck. It is slightly unconventional and may not work for everyone, but it works for me.
There are several different ways to play the E chord, so it is worth experimenting until you find a shape that suits your hands.
7. The placement of the thumb
Ukulele teachers and players have different opinions about where the thumb should be placed.
Some believe that it should generally remain behind the neck, while others take a more flexible approach and allow the thumb to move over the neck when it makes certain chords easier.
When you begin learning on your own, you may naturally place your thumb over the neck because that feels comfortable.
Honestly, I am still working out what is best for my own hands.
I try to remain aware of the position of my thumb and keep it behind the neck when that feels comfortable. However, pressing too firmly against the neck can cause discomfort in my thumb joint, so I try to combine good control with a relaxed grip.
The most important thing is not to squeeze the neck harder than necessary. If a particular position causes persistent pain in your thumb, wrist or fingers, it is worth changing your technique or asking an experienced teacher for advice.
8. One Final Beginner’s Hurdle
Strumming with my index finger seemed impossible at first, and it continued to feel impossible for a very long time. I strummed with my thumb for a year or more before I finally understood how to use my fingers lightly enough for the nails to glide across the strings.
I am mentioning this because it was one of the main things that seemed completely beyond me for many months. But in the end, it became possible. You simply have to develop the feeling for it in your hands.
The ukulele is not quite as easy as people sometimes claim. It is still an instrument, and you need to play it regularly before your hands become accustomed to it. It may be easy to begin, but it becomes more complex as you progress.
If you have comments, would like to add something or have any questions, you can contact me by email. I may include useful feedback in this guide in the future.
These are my ukuleles
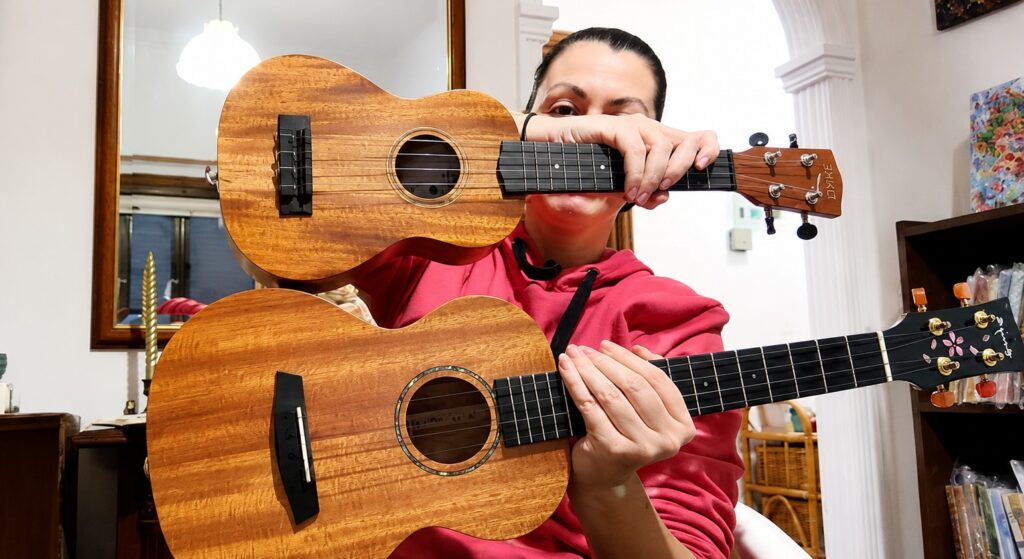
The Duke of Uke Soprano
I have absolutely loved this instrument. It’s a pity they don’t make these anymore.

The Enya Tenor – Enya Tenor Ukulele EUT-MS 26 Inch Solid Mahogany . In the photo below you can see my soprano next to the tenor one.
Me singing a Greek song with the soprano uke.